Thursday, July 21, 2011

From the Archives

I found these light microscope pictures when I was organizing my computer files today. I think they're the first ones I ever took with a classroom-grade microscope camera. Luckily, I get to use the microscope camera in the Lab, which takes pretty cool pictures (even with fluorescent light if you so desire (and which many studies call for)).

Nonetheless, these are all pictures of different cells (the names of which are listed below the picture):

Cheek

Cork

Elodea

Onion

Potato (Iodine Stained)

Onion

Turtle Gunk

Passion Fruit Pollen

More Passion Fruit Pollen

Red Bell Pepper

Passion Fruit Pollen (Iodine Stained)

Wednesday, July 20, 2011

O californica Ossicle Photos

O californica ossicle photos taken under white light with auto exposure and (this was actually a faux pass on my part) with auto white balance, which negates any special fluorescing or refracting properties by making the tiny bones look white. Nonetheless, this gives you a good idea of what these ossicles look like under the microscope, although they aren't nearly as big when I am sorting them into different tubes.

Any bluriness is probably due to that part of the ossicle being out of focus. Since almost all the bones are 3-dimensional and by no means flat, so getting all of the ossicle in-focus at once is almost impossible at such high magnification levels.
An interesting view of a verterbrae

A pentagonal top...or bottom? shield

Another top (or bottom?) shield

A lateral shield. Note the ridges and hook shape


Under increasing levels of light, the ossicles' refractive properties become visible


Any bluriness at the edges or anywhere on the ossicle is most likely due to the fact that that part of the bone was out of focus since these ossicles are not flat by any means. In particular, the one above is shaped rather like a Pringle. Differing heights don't allow of the bone to come into focus at once.


Without the auto white balance, with an RGB of 1,1,1, this shield refracted green light (the color of a brittle star's luminescent arms). I need to take more pictures to confirm this however. This one makes for an interesting start though.

Tuesday, July 19, 2011

The Ossicle Sorter TWO

Similar in design to its predecessor, the Ossicle Sorter 2 came into being as a result of necessity: in order to prevent the a mix-up in ossicles from different species of brittle star.

The white specks in the already teeny tube are brittle star ossicles from a species different from O. californica


A new species of brittle star facilitated the creation of a second Ossicle Sorter in order to avoid any mixup between the microscopic bones
Thus: THE OSSICLE SORTER 2

To the naked eye, this is what O. californica ossicles look like on the Ossicle Sorter
The new brittle star ossicles are a lot smaller as shown here on the Ossicle Sorter 2

Green tape was used to prevent a possible mix-up
Under the highest magnification that the light microscope I use can go to, this is the biggest the tiny bones in the Ossicle Sorter 2 appear


The Eppendorf tubes containing hundreds of 'tiny bones' lay dramatically in the light of the light microscope

Quite Dramatic

Friday, July 15, 2011

Sacrificed in the Name of Science

Chaetopterus variopedatus is a polychaete (marine bristle worm) that lives its whole life in a u-shaped tube on the ocean floor whose two ends stick up like little chimneys. The tubes of this parchment worm are certainly parchment-like and have a leathery, tough consistency that makes ripping them open and pulling out the worm itself a difficult exercise.

The really cool thing is that the worm secretes a bioluminescent mucus, glows when it is shocked...and even the tips of its tube have luminescent properties. That is why, after carefully taking it from its tube, we save the tips of it to send to another lab that analyzes them.

A scientific drawing of C. variopedatus


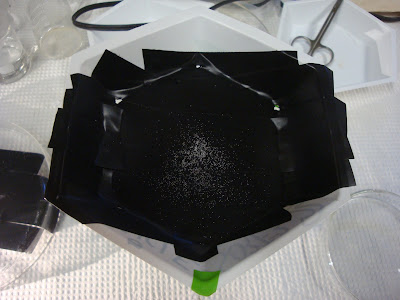
C. variopedatus tubes stick up from their black trays in the experimental aquarium
Condensation blocks the extracted tube worm from view. However, this beaker will be taken into the lab and the worm pulled from the aquarium water and into Artificial Sea Water

The procedures below describe an experiment to test the effect of magnetism on the tube worm's bioluminescent mucus. Since the mucus is Ferrous and a reaction involving Fe+2 and H2O2 (peroxide) is necessary for the organism to luminesce, there is a possibility that magnetism might increase the luminosity (brightness) of the mucus by somehow stimulating the ferrous reaction within the mucus. Thus, I used rare earth magnets in an attempt to observe the effects of the magnetic field on the mucus.


C. variopedatus Mucus Luminosity in Presence of a Magnetic Field
Procedures

Once worm is taken carefully from its tube and into the lab, place into dish 1 with chilled ASW and clean any dirt or gonads on whole worm.

Then cut with scalpel between second and third segments of its “neck” and put the upper cut portion in dish 2, also filled with chilled ASW. Clean any gonads from cut area and dirt from mouth/feelers area.

Place in beaker with 1,000 microliters of KCL in ASW on ice for 7 minutes and 30 seconds.

Pipette Mucus and KCL into an Eppendorf tube also on ice.

Put 750 microliters of the Mucus/KCL into a cubette with 750 microliters of ASW in it. Label one side A and the other B.

Do the same for the second cubette, except place two square, flat rare earth magnets (labeled ‘A’ and ‘B’) on either side of cubette.

Take two 100 µl samples immediately from the bottom of the cubette 1 [without magnets]—one from side A and the other from side B—and place samples in separate Luminometer tubes. The luminometer should be set by the User Protocol “Mucus-10S” for Kinetic measurements at a frequency of 10 per second for a total of 100 measurements. Also, make sure “Lid Start” is On. Test the No-Magnet samples first at 0’ and 5-minute intervals after for 25 minutes.

Do the same for cubette 2 (with magnets). There should be a total of 6 samples taken from each side of each tube.